IPhone – iPad email setup

Yes – It SHOULD be easier to do… but here’s some help since it’s not always the case…
This article will show you how to manually set up your iPhone or iPad email account(s).
What You’ll Need:
Before you start, you’ll need the following:
- Your email address: name@yoursite.com
- Your email password.
- Choose IMAP or POP – Choose IMAP if you want to check the account on multiple computers or mobile devices. POP downloads the messages locally to your computer/device.
DISCLAIMER
The following tutorial is provided as a courtesy to our customers to help you configure your iPhone software to work with your email provided through your hosting through PenguinHosting / The Image Stop ltd. If you have further questions about your iPhone, please visit http://www.apple.com/support/iphone/.
This article is provided as a courtesy. Installing, configuring, and troubleshooting third-party applications is outside the scope of support provided byPenguinHosting / The Image Stop ltd.
General Configuration Overview – screens and setting names may vary depending on iPhone/iPad version being used.
1. From the Home screen, choose Settings.

2. Next, tap Passwords & Accounts.
3. In the Accounts section, tap Add Account.
4. Choose your email account type. For setting up email to work with your Penguin Hosting domain, choose Other.
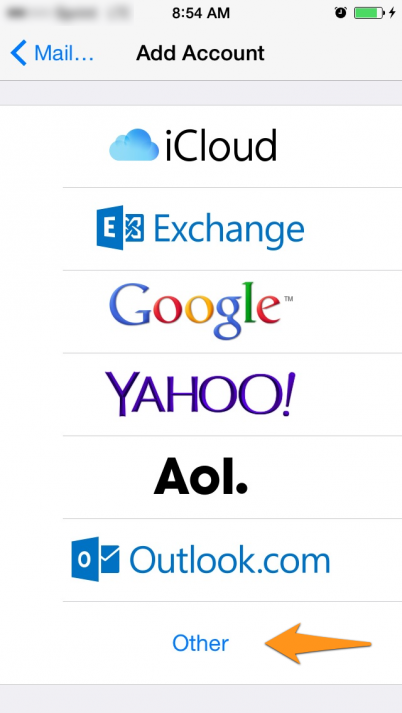
5. Select Add Mail Account under the Mail section.

6. Enter your account information.
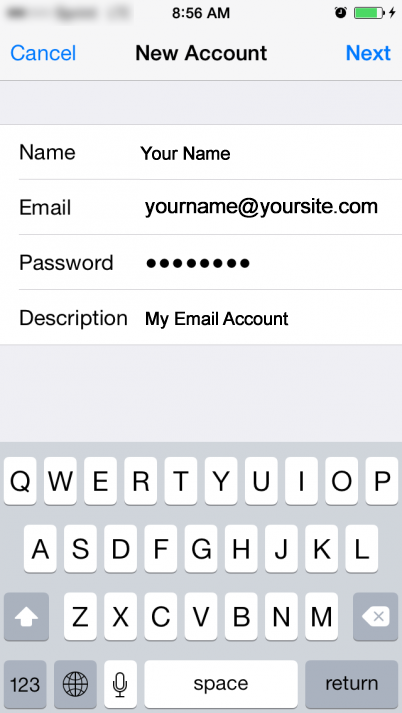
7. On the next screen, enter your account details. (Incoming and Outgoing Servers)
Incoming Mail Server
Host Name: mail.yoursite.com
User Name: yourname@yoursite.com
Password: Use the password provided to you with your initial introductory email.
Outgoing Mail Server (SMTP)
Host Name: mail.yoursite.com
User Name: yourname@yoursite.com
Password: Use the same password provided to you with your initial introductory email.
Once the email configuration is added, tap Next to continue.
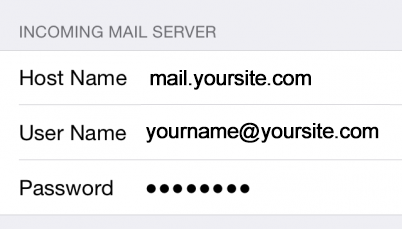
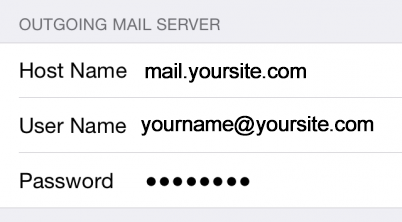
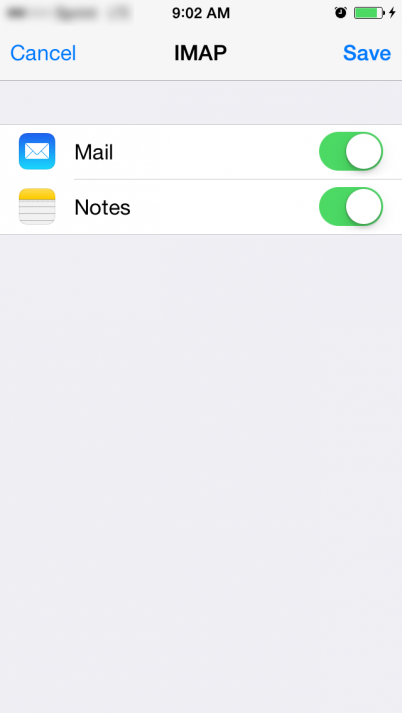
8. Choose what information you want to sync with your phone and tap Save to save the entered information. Your iPhone will then verify your account information.
Upon successful completion, you will be taken back to the Mail screen. Your account will now be listed in the Accounts section.
Advanced Settings – IF you still have issues…
If you have completed all the above correctly and are still having difficulty accessing your email, be sure to go into your Advanced settings – activate “SSL” and ensure your Server Port settings are correct according to the settings obtained within your Penguin Hosting online account access.
This will often solve any problems that may arise.

